Wednesday, March 31

I need help naming my newest 'mouth' to feed


Hello! Anybody still with me here?

We're on the sourdough adventure days 4, 5 and 6 - making our starter - you can join us anytime!  Days 1, 2 and 3 are here.

I'm having fun on this little adventure, every day it changes a little bit and I can see (and smell - not offensive, just yeasty!) progress! 

I'm told that I need to give my starter a name.  Why?  So I remember that it is alive and needs to be fed.  So friends, I need a name if you can suggest one or a few?

Here it is on day 4 - after I have removed albeit 1 tablespoon of the starter (just chuck it in the bin or compost)
Then 'feed' it again with 70g rye flour and 30g plain flour.
Add 100ml water and stir. 

Here we are on day 5 - look at the bubbles!
Feed again on day 5 and 6 (you don't need to take any out) the same 70g rye, 30g plain flour, 100ml water.

See you in couple of days when I'll have a name!

Monday, March 29

Some days I wish it was still like this..


When they talked so quietly.

Laura and Olivia 4 years ago today.... *sniff*

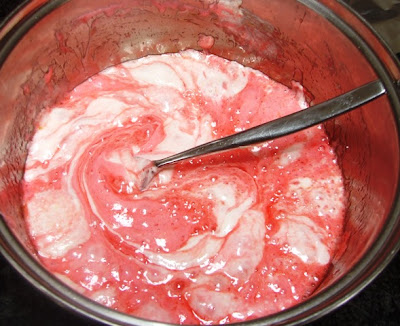
Raspberry Rice Rectangles - no baking!


Hello!


You're going to love these ones if you have kids, or even if you don't!  These are a great addition to a lunchbox or to take to a BBQ or have a birthday party.  I know these will have an encore performance at Pink Ribbon Day for sure!


They take about 15 minutes to prepare so really, no baking required!


Ingredients:
280g raspberry and vanilla marshmallows
75g butter or margarine
4 1/2 cups rice bubbles
1 cup rolled oats
1/2 cup dessicated or shredded coconut
1 cup dried raspberries (you can get these from fruit markets/deli or healthfood shops)


Method:
In a saucepan, melt the butter and marshmallows together over medium heat.  Stir and take off the heat once melted.


In a large mixing bowl combine the rest of the ingredients


Prepare a baking dish with aluminium foil, ensuring all sides are covered with some overhang to fold over the top.


Stir in the marshmallow and butter mix and stir quickly to combine.


Press the mixture into the baking dish, make sure it's compacted by pushing down into the corners with wet hands.


Cover the top and transfer to the refrigerator for 2 hours.


Take out of fridge and lift out the aluminium foil, peel off and cut into rectangles (or any shape you like!)


Store in airtight container away from direct light for 3-4 days

Sunday, March 28

Sunday Baking Project: Chocolate Nougat Cake


Now don't have a heart attack when you read the ingredients people.  Yes, there really are Milky Way bars in there AND a cup of sugar!  My first thought was - oh no, waaay too sweet for me.  But it actually makes quite a large fluffy cake so you can make many serves.

I made two - one for my Nannys' birthday last week and one for hubby to take to work.

I iced with butter icing mixed with melty milky ways - that part was too sweet - I would ice with melted chocolate when I make it again!  Decorate the top with Easter Eggs for next Sunday perhaps? Or dust with icing sugar - it is honestly a nice enough cake to stand alone without icing.
Ingredients:
7 snack size or 3.5 regular size milky ways
1/2 cup (125g) butter or margarine
1 cup sugar
1 egg plus one yolk extra
1/2 tsp vanilla extract
1/2 cup buttermilk
1 1/4 cup self raising flour


Method:
Preheat oven to 160 degrees c

Grease and flour a ring or round tin, leaving the top 1.5cms free of butter and flour.  This is important as the cake rises throughout the baking and it could case it to spill over if you do grease and flour to the top.

In microwave or double boiler, melt  Milky Way bars with 1/4 cup butter. Stir until smooth.  Set aside.

In your mixer/mixing bowl, cream the remaining butter with the sugar, ensure it is pale and smooth, then add eggs plus extra yolk.  Continue to mix through and add vanilla essence.

Alternatively, add 1/2 buttermilk then half the flour until all mixed through

Lastly, pour in the chocolate/butter mix and mix for about 2 minutes until light and fluffy.


Bake for 50-60 minutes until the skewer comes out clean in the centre.

Run knife around the outer and inner of ring and turn upside down on plate for 10 minutes before gently shaking out.

 Cake suitable for freezing before icing.

Saturday, March 27

SnapHappySaturday: My little star..


Look at my baby enjoying school


This is her star outfit to perform 'Brilla, brilla, piccola stella'  (Twinkle Twinkle Little Star in Italian)

At computers in the library - maybe the makings of a future blogger..?

After all, she CAN write recipes..!


Here she is in her classroom

and with Nanny (my grandmother) on Grandfriends day

She loooooooooooves school and is bitterly disappointed that we soon break for holidays!

Friday, March 26

Sourdough Adventure - making Starter


Hello friends!

I hope you got your rye flour and plain flour, jar at the ready.  If you haven't there's still time!

About the starter:
The starter basically will perform the same purpose as yeast does in conventional bread.  It is basically fermented flour and water.  There is a method to the madness  - and you love bread, and sourdough in particular it's a worthwhile cause, and not much effort really!

So let's go!


Today you will need:
Your jar
Some cling film
A metal spoon
Your flour


Method:
Boil your kettle and then pour boiling watter into your clean glass jar and  leave for 10 minutes with your spoon resting inside. This is to ensure all residue/germs that might be on the spoon are gone.


Next - and people we are going to do this same thing today, tomorrow and the nextday (i.e. 3 days)


To your jar - add
35 grams plain flour
15 grams rye flour
50 grams water

Stir with your metal spoon to combine and cover with cling film,  Leave on your windowsill or somewhere warm - but not hot - between 20 and 30 degrees.

Now people who have told me here, by email and otherwise that you are joining, please link yourself/a photo of yours, so we can all do it together, I and I'm sure other readers woul love to see it all coming along!  Feel free to invite others along too!


Psst I'm posting over at Make it from Scratch today - check out my Mini Cheaty French Vanilla Flans

Fast Food on a Friday: Finger licking chicken wings


Now I will admit,  on paper/on webpage this recipe looks like nothing special.  Don't let it fool you.  Reminiscent of Nando's Lemon Herb chicken this one will get an encore performance in your house.    My kids were bitterly disappointed that I didn't have enough for thirds, and our playdate visitor proclaimed that she wanted to eat these every time she visited.

Great for a regular meal or BBQ offering.  Super yummy and indeed, finger licking good.

Ingredients:
1 1.2 kg chicken wings
2 tb olive oil
Juice of three lemons
1 1/2 tb fresh oregano leaves
1 1/2 tb fresh thyme leaves
1 1/2 tb fresh rosemary leaves
4 cloves garlic
Pinch Pepper
Pinch chilli flakes


Method:

In a mortar and pestle, mix together the garlic, olive oil, thyme, oregano and rosemary.  Pound until a chunky paste.


In a plastic container or ziplock bag, place the lemon juice, chicken wings and garlic/herb mix in and marinade for about 1 hour minimum.

Preheat oven to 200 degrees c and layout your chicken wings on an oiled baking tray (with a lip) sprinkle with a chilli flakes and pepper.  Alternatively you could place on an oiled grill either on a BBQ or the stove.

Place in oven for 30-40 minutes until golden.  Serve with baked potatoes and salad or anything you like!


Psst, I haven't forgot about our Sourdough adventure, see you back after lunch!

Thursday, March 25

Tweet! Easter Cookies


I'm getting in the Easter spirit at the moment, looking forward to Eloise having her first school holidays (although I do have premonitions in the first couple of days I might be counting down 'til they're over... !) Hubby having days off work and generally spending time as a family.

Ok, these don't look like they come from a bakers shop but they are cute and my girls will love them!  If you're a dab hand at icing (I am NOT obviously!) then you can make yours lots prettier.

The biscuit recipe really is dead easy and doesn't take long to make.   A great little cut-out cookie dough activity for school holidays

Cookie/Biscuits:

220gr  butter, softened
1/2 cup white sugar
 zest of 1/2 lemon
1/2 teaspoon salt
1 large egg
1/2 teaspoon vanilla essence/extract
2 cups plain flour


Icing:
1/4 cup egg white
450gr icing sugar
water, extra
food colouring, extra

Method:
Cream butter and sugar with lemon and salt until pale and fluffy.
Add egg, then vanilla essence, then flour, allow to form a ball of dough on your beaters.


Place in ziplock bag and refrigerate for one hour.

Preheat oven to 180 degrees c
Remove dough from refrigerator and allow to thaw for 10 minutes.
Pull out 1/3 on to a lightly floured surface and roll out, cut shapes and put onto greased baking tray

(I got my egg shaped cutter from www.inspiredbychocolate.com.au for $2.50 - lots of great Easter stuff there)
Bake for 10 minutes or until edges start to go golden.
Remove from oven and transfer to wire rack to cool.

Method to make Icing:
Place egg white and icing sugar in a mixing bowl, mix until well combined and add colouring drop by drop until the right colour is achieved.  The consistency should be a little runny but firm.  It should form thick ribbons when a spoon is dropped in and raised.  Add drops of water gradually until this consistency is achieved.


Ice and decorate as desired!
(Eyes and nose of chicken made with fondant icing, pupils are currants - flowers cut from fondant icing - centres of flowers from fruit candy)

Wednesday, March 24

Preserve Me: Lemon/Lime Cordial


At last months' farmgate and and visit to Bilpin I went totally overboard. Limes are usually so expensive that when I saw them at $1.00 a kilo, and then was offered free ones at the orchard, I was a lime glutton with no shame.

I have done my best this month to use them - friands, lime and coconut cake, splice iceblocks but I still have more. more. more to use.  This, and a couple of excess lemons found me wondering how I could take advantage of the bounty.

Then hubby came into the kitchen and poured himself a cordial.

Lightbulb moment.

When I went searching for a recipe I admit I was disturbed by the amount of sugar in cordial.  Gobsmacked.  But then I thought, well, when you drink it, it's really watered down.  Right? Now I've tasted it, I think it will not only be diluted with water, but definitely with ice, vodka.   Oh, and let's not forget Tequila, crushed ice and salt... yee-ha.

Ingredients:
2 regular sized lemons
6 regular sized limes
1.5 kg white sugar
4 cups boiling water
1 tsp citric acid

Method:
Zest 4 of the limes and 1 of the lemons and set zest aside.
Juice all lemons and limes, leave seeds in if you wish add to zest.


Pour boiling water into large jug or stockpot.  Add sugar cup by cup stirring as you go to dissolve sugar best you can.
Add zest and juice, cover for 24 hours.

After 24 hours, strain the jug/stockpot over a sieve with muslin (I used a linen teatowel - smells lovely when you wash it later!)
Pour into sterlised preserving bottles, process (i.e. reboil in the stockpot) for about 45 minutes if you plan to keep, or straight in the fridge if you wish to consume within the next couple of weeks.

Makes 2 litres cordial or 12 litres made up.

Tuesday, March 23

From The Slow Cooker: Brandy Pork Sausages


My initiation to pork sausages was at the age of twenty-one.  I had to fly to the other side of the planet to be initiated as an official pork sausage lover.  It's hard to find a pork sausage to equal that of the gorgeous varieties they have in the UK and I do miss them so but this takes me back to my pork sausage nirvana - a cold day and a pork sausage stew.


Simple and tasty, whether you're familiar with the pork sausage or not, I urge you to try them!  Fantastic with steamed cabbage and mashed potato!


Ingredients: 
 (note the pictures show I doubled the recipe as I treated my sister and her family who also miss the UK with these during their recent visit!)


8 thick pork sausages
1 large onion, sliced thinly
1 large carrot, thinly sliced
1/2 cup brandy
1 tb cornflour
2 tb tomato sauce
1 tsp Worcestershire sauce
2 cups water


Method:
Prick your sausages and lay them in your lightly greased slow cooker
Mix in the onion and carrot
In a jug or bowl,  add cornflour and gradually add tomato sauce and Worcestershire sauce until becomes a paste add the brandy, then the water and pour over the sausages and onion/carrot.
Put lid on and turn onto auto/high for 3 hours.  Add a little more water at this point if it's a bit dry  - stir and turn down to low for 1 hour.  


Serve!

Monday, March 22

Make it this week: Easter Egg Hunting Basket


Every year I say I'm going to do this and every year slips by and I end up buying easter baskets that fall apart anyway!

We had lots of fun putting these together but a tip, get this prepared the night before or whilst the kids are happy doing something else because it takes about 15 minutes to prepare and kids can get painful with excitement at times as we all know!


What you'll need for each basket
1 margarine container - round or rectangle - doesn't matter
Clear packaging tape
Wrapping Paper or scrapbooking paper of your choice, cut into 2cmx2cm squares
2 x split-pins or brads
70cm x 2cm wide ribbon


Process:
Preparation
Cut the rim off the lid of your margarine container, discard the lid part, keeping the rim

With a tiny hole punch or a corkscrew on each side and measure up where the handle will go and put holes in rim in corresponding spots.

With your brads or split pins, affix the rim to the container, handles on in the inside.  Cut off excess rim below the brad/splitpin and then cover the split end of the pin/brad with packaging tape.


With your packaging tape, tape around the outside of the container about 2 inches, then fold back so the sticky side of the tape facing out.   Keep taping until the outer of the container is completely covered.
Cut up your paper, and set up with the baskets ready for the kids to get to work!

Kids get creative
Let the kids get sticking the paper on the outer of the container.  You may want to add some Easter stickers also.  Make sure you cover as much of the container as possible.


When they're done, go around the container with packaging tape stick side down to keep all bits of paper etc. on the container.

Lastly cut 20cm off the ribbon.  With the remaining 50cm  stick an end of ribbon to the inside of the handle and twist around to the other side, tape or glue to the other end.  Tie a bow on top.


Frills in the Hills Copyright © 2009-2015