Monday, March 7

Cheaty cheese and spinach gozleme - sandwich maker style


Whenever I frequent markets or food halls with Turkish gozleme - it's almost irresistible.  You can smell it as you pass and it's cooked right then and there.  Love it.  Every time I buy it I swear to myself I'm going to make it - finally yesterday I made it for lunch.  Super happy with the results.  

Adapted from www.taste.com.au

Ingredients
dough
300ml warm water
1 tsp dry yeast
1 tsp caster sugar
1 pinch salt
3 cups plain flour
2 tb oil

filling
200g danish feta, crumbled
50g cheddar cheese, grated (I used american red, but use what you like!)
1 1/2 cups baby spinach
Cherry tomatoes (optional)

Method:
Place the warm water, yeast, sugar and salt in a bowl, and leave for 5 minutes.

Add flour and oil and then stir together.

Then knead on a floured surface (or in a breadmaker/mixer with a dough hook) until the dough becomes smooth and elastic-like.
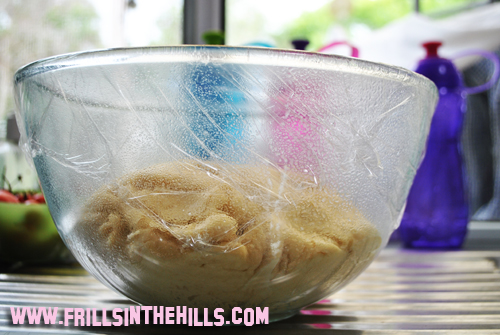
 Divide into four, and pat down on a greased tray.  Cover with clingfilm or tea towel until it roughly doubles in size (about 1 hour)

Use the time whilst it's rising to set up your 'making station' with the fillings, salt and pepper.

When your dough has proved, flour down your surface.

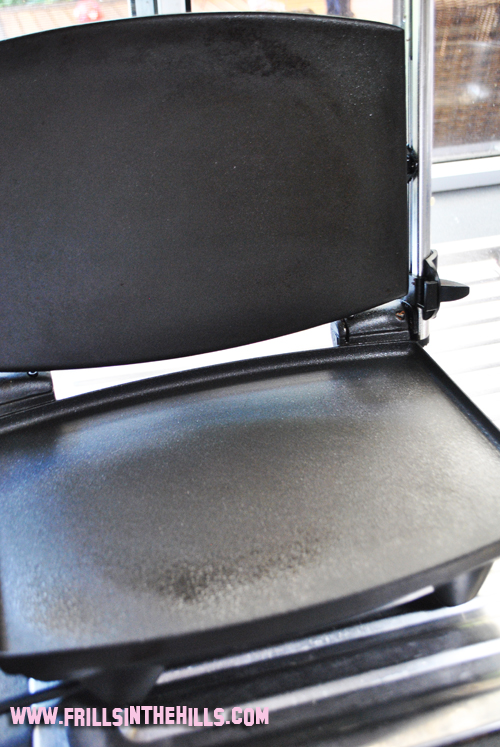
Turn on your sandwich grill, or heat up a frypan if you don't have one (or even fire up the bbq if you like!) and spray with canola oil.
Divide your first roll of dough in half, and roll it out into a rectangle shape, as thin as you can without making holes!

Place the dough half on the plate (or fully on if you can't manage half)  

Then on the top half, start adding your filling.

Then fold up the bottom half on and cover the filling.

Close the sandwich maker.  If you're using a frypan or bbq, cook for about 2-3 minutes and then flip over.

When golden brown, remove from the grill

Chop up in strips, and cut some wedges of lemon.

Serve!  

This post has been submitted to yeastspotting, check out all things yeasty over there!

Sunday, March 6

Sunday baking project - Kolaches - the Czech breakfast! (Good for any time though!)


You may have seen these in European bakeries or you may have eaten them in a nice hotel... which is where I first had them many moons ago.  These are ever-so-popular in the US at present I'm told and they serve them savoury and sweet but I just can't imagine it quite honestly.

Kolaches are soft and light semi-sweet bread (not overly) with cream cheese and fruit/jam centre.  Not unlike the danish really but much lighter and much less sticky/sweet.  The Czechs like to have these for breakfast, but  they are lovely with a cup of tea for morning or afternoon tea.  I especially like them right out of the oven but they are nice cold and if you love them warm you can pop them back in to reheat.

This makes 24 kolaches - they are about 10cm in diameter so you could halve the batch if there's only a few of you or make the full amount if there's a few more or you would like to share with your neighbours - they may magically appear when they smell you baking them... don't say I didn't warn you.  Sorry if you don't like your neighbours!


Ingredients:
3/4 cup milk, slightly warm (30 seconds in the microwave)
2 tsp dry yeast
3/4 tsp lemon zest
3 eggs
1/4 cup icing sugar
125g butter or margarine, quite soft
4 1/2 cups plain flour


Topping
125g cream cheese
1 small egg
1/2 tsp lemon zest
1/4 cup caster sugar
Jam of your choice


Method:
Place your warm milk and yeast together, allow to sit for about 5 minutes.

Pour milk and yeast into a large bowl or machine with a dough hook and add butter/margarine, eggs and lemon zest.

Add three of the cups of flour initially and mix in well.  Lastly knead in the last 1 1/2 cups flour - it will become a very soft, light dough.

Place into a greased bowl and cover with cling film.

Set aside until it doubles in size (anywhere from 1- 3 hours depending how warm/humid it is)

Preheat oven to 180 degrees c

divide mixture into 2 halves, and cut each half into 12 equal portions

Roll each portion into a ball and flatten down and place onto a greased baking tray.  Let them rise a second time - for about 30 minutes should do it.
 

Press a well into the centre of each portion with the back of a spoon.

They should look something like this when you're done:

Mix your filling together 

And pour/spoon into your 'cavities'

Then put in your favourite jam - I used these lovely ones I got at the easter show last year- Sour cherry jam and a raspberry and vanilla jam.  You could add a few frozen raspberries or fresh blueberries too.
 
Bake for 15 minutes or so until golden brown on the bun part.


I made 1/3 of them plain filling, and the others with jam.

Enjoy!  


This post has been submitted to yeastspotting, check out all things yeasty over there!

Friday, March 4

Cheaty and Frugal: Quick chocolate mud cake


Now we all love to cheat every now and then and I'm not usually a fan of a cake mix - but they have their place don't they?  I've been wanting to try this for ages as the Americans are quite fond of putting pudding mix in their cakes and I thought I'd like to give it a whirl in more fudgey proportions.

The first one I made last week was of the vanilla variety and I put it in a bundt pan.  Three mistakes made there.  Bundt pans really can't be lined and with the fudgey-gooey-ness of this cake it stuck.  Secondly I knew it would be better as chocolate...  and thirdly it actually needed more fudgey-ness.

It's not super sweet and it is pudding-y - I think it's perfect.  I love it!


I feel like a bit of a fraud calling this a 'recipe' but anyways...

Ingredients:
1 x box white wings moist chocolate cake mix
2 x cottees instant pudding packets
3 cups milk (I used lite, use what you have!)
2 eggs

Method
Preheat oven to 160 degrees c regular oven or 140 fan forced

Mix all ingredients until well combined.
Grease and line a round cake tin (or springform pan)

Pour the puddingy goodness into the tin and smooth out the top

Bake for 1 hour - until cooked through.  Test with a skewer to check ..

Turn upside on a plate/platter to cool (Or eat it warm, yum!)

You may choose to cover in melted chocolate - I adore this and will definitely make again!  So easy!

Thursday, March 3

Tools to help your child learn the alphabet sounds (phonetics)and making words from them


[image credit]
It's a really interesting year for me this year - last year with Eloise starting school I still had 2x4 year olds with me every day - and so that limited the amount of volunteering and class involvement I had at school.  I really felt sad for Eloise because she kept asking me in particular to be a 'reading mum' I suspect because she's quite naturally gifted in the reading area, she wanted an opportunity for me to watch her shine.

So this year I am doing 'reading mums'.  Both with Laura's and Eloise's classes.  I'm a 'Maths Mum' for Olivia's class.  So needless to say, I am at school three mornings a week and that promise of 'personal time' isn't looking as plentiful as I first thought.

I'm loving it though - it's really helping me help my girls at home and I'm more in touch with what they are learning in the classroom.

I have two girls in two different kindergarten classes and so the teachers approach things differently.  I'm noticing one of my girls is getting the concept of sounds and 'glue-ing' sounds together to make words than the other - and this could be down to learning style - but I've noticed since I made the same tool at home that one uses at school - she's improved a lot.

The girls love doing it and I feel like I'm really contributing to their reading skills.  I've always been a reader (and a writer!)

So what you do:

  1. Print out all the pages (4 in total) from here (PDF file - 60.71kb)
  2. Laminate the pages if you have access to a laminator - if you don't - don't worry - you just may need to reprint at a later date.
  3. Cut out all the letters so they are individual squares
Then you have a kit!

Then you start with your sounds!  We started with a, s, t, m and then have built on them each week by adding f, i, d, e and this week we've added l, h, b and o.  I'm pretty sure after that comes n, c, p, u  and then g, k, r, w and then j, v, y with q, x an z last.

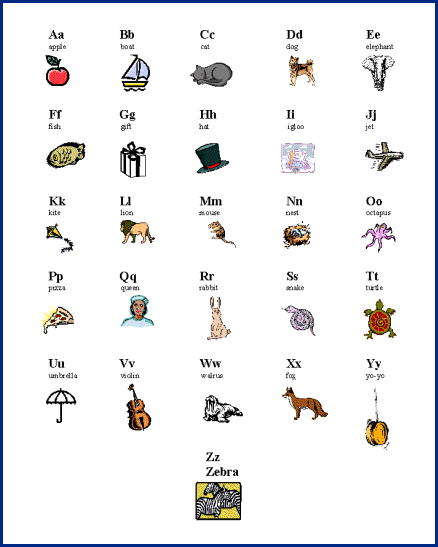
If you're not sure on how you should be sounding out words phonetically - i.e. as sounds not letters - example: pronounce the letter 'i' like a sharp 'i' as in 'igloo' not 'i' like 'eye'.  Here's a chart which you can print to help with the right pronunciations.

You start off your time with the two sound board.  And using the first week - you can use a,s,t m to ask your child how many sounds they hear in the words at, am, at - and then ask them if they can show you the letters and then place them on the tiles.  Then placing their finger on the dot, they move across whilst saying the sounds out loud to glue the letters together.

Then you can move on to 3 letter words like sat, tam, mat. 

Introduce the new letters each week and reinforce the previous letters by adding them in to make more works like sit, set, fed, etc.

Later on down the track you may want to make your own 4 letter mat too!

We are loving this and now my girls are after 4 weeks of school and not really knowing their phonetics at all - identifying words of their own!  They are amazing me!  I store them in a big ziplock bag - it's a great way to spend one-on-one time with your kids whilst helping their reading skills!

Wednesday, March 2

Spicy tagine meatballs


I made this up on the fly yesterday when I had a sudden hankering to use my tagine.  I love it and don't use it as often as I'd like.  I really should use it more - it doesn't have to be just a curry.    

I have used beef mince but you could also use lamb I think, and I think it would also be nice to mix say 1/2 cup ricotta cheese into the meatballs and I think the sauce would be nice with some capsicums too.  It doesn't 'need' these ingredients and it was delicious on its own but if you're a tweaker like me, that's what I'd recommend.  I'm definitely doing the ricotta next time, the capsicum, probably not, as hubby is allergic.

Make it without chili or reduce the amount if you're not a fan too!

This doesn't take a lot of time and it tastes like you've put a lot of love into it but really, it's easy-peasy.   The aroma that fills the house is heavenly - it builds the anticipation you're about to eat something amazing.

Ingredients:
Meatballs
750g beef mince
1/2 large brown onion
small bunch (say 3 sprigs) of continental parsley
1 teaspoon paprika
1/2 teaspoon cumin
3 cloves garlic, crushed

Sauce
1/2 large brown onion, finely chopped or processed
1/2 tsp paprika
1/2 tsp cumin
1/2 red chili, seeds removed, chopped finely
400g tin of diced tomatoes
2 tb tomato paste

To serve
sprig mint
1/4 cup greek yoghurt


Method:
In a small food or with a mortar and pestle process/pound into a paste the onion, parsley, garlic, paprika and cumin.

The mix it through your beef mince.
Roll your mince into 5cm diameter meatballs and set aside.

Heat your tagine base on your stove and add 1 tb oil.  Let it heat up and then add the onion, paprika, cumin and chili. Stir well and allow the spices to develop for about 1 minute.

Add the tomatoes, heat through.

Fill your tin with water and add the tomato paste to it and stir well, pour over the meatballs and tomatoes - no need to stir/mix. 

Turn down the heat to a simmer and put the lid on your tagine.  Allow to simmer for about 20 minutes (whilst you cook some rice or prepare some cous cous)

Take the lid off, the pan should be saucy, with meatballs intact.


Drizzle over the yoghurt and chop up the mint into smaller pieces - serve on rice.

So fess up!  Do you like to tweak a recipe?

Tuesday, March 1

I've done a bit of re-decorating...and some new features


On Sunday evening I conferred with a friend of mine who is really the guru-ess of what looks good onsite - and told her I wanted to make a new button for those to put on their blogs (yes thank you for those who emailed asking!) and also a new avatar for the facebook.

She suggested that perhaps I ditch the green on my site (remember the hills?) which is when I confessed that for a while now (well over a year in fact) I was wanting to give the site a new look without changing everything.  I like the layout (and it took so long to perfect it a stubborn part of me isn't ready to part with it). She suggested I put together a 'inspiration page' where I copied and pasted images I liked and what look/colours etc I liked.

Well that got me started - and I found my new colour scheme - then I found my images, did a new header and yesterday I spent the whole day re-colouring/designing - I thought I was going to break blogger.

So if you were online yesterday you might have seen some of my 'tinkering' and there may be a little more...

Some things I want to quickly ensure you know:

First of all - you may not have been aware - you can subscribe by email - there's a few of you who do this already - but I thought I'd make it easier for you by putting a button up for you... see over there to the right --->

There's a new 'print friendly' button there on the navigation bar - if you want to print a recipe - just open the post, click on 'print friendly'

It will remove the right column and include all the comments from the post (because I know how helpful you all are with questions and variations - and I want to include those!)  Then you can print as per your normal methods.

Hoorah right?  I know a lot of you have asked (begged me) for that functionality - thank you must go to my friend Di !

The other new thing you may find is riiiiiiiiiiiiiiiiiight down the bottom you will find some more shortcuts...here's a few examples  Anything you want added - let me know!


EDITED:
And finally here is the button (on the sidebar but here's another!)


Frills in the Hills Copyright © 2009-2015