Showing posts with label sweets. Show all posts

Thursday, December 12

(I'm dreaming of a) White Christmas


Have I got you all singing that good ol' Bing Crosby number?  We've been humming and whilsting it a bit around this house last few days as we're headed to New York for Christmas this year - one stop in our worldwide 5 week adventure.  There's been snow there for the last few days and we're hoping it sticks around for a bit as New York will be wonderful enough at Christmas time but with snow is like a cherry on top I think!  We're headed off today stopping off in LA for a few days on the way.

So speaking of cherries, and white Christmas - I just wanted to share one more Christmas morsel with you - I think white Christmas is something you either love or hate, unless you're someone like me where I'm pretty much in the middle.  I have to be in the mood for it, but it's such a lovely taste of nostalgia I have one piece and I remember how much I loved it as a kid - it was our Christmas treat and was given out a lot at Christmas time by friends at school and neighbours - yes we're talking the 70's there my friends!

My Eloise said this is her favourite of all the treats I've made for family and friends this year so clearly it can still win new fans too.  It looks so festive too!

Ingredients: (makes about 30 pieces)
1/2 cup glace cherries, chopped
1/2 cup dried apricots, chopped
1/2 cup shredded coconut
1/2 cup sultanas
1 cup rice bubbles
500g white choc melts

Method
Place all ingredients except chocolate in a bowl and mix well.

Line a square baking tin with canola spray and baking paper.

Melt your chocolate, I do mine in the microwave by heating on 50% power for intervals of 1 minute stirring in between each minute until melted.  This amount should take 2 mins 30 seconds.

Pour over your dry ingredients and mix quickly.

Pour into tray and leave to cool either on the bench or if it is a hot/humid day - in the fridge.

When it hardens - about 20-30 minutes, lift out and slice.

Looks festive right?

Store in an airtight container for up to 3 weeks in the fridge - won't last that long though!

Keep up to date with where we are on our trip by following me on instagram!

Tuesday, December 10

Rocky road with free download 'You rock!' gift labels


My hubby is a confirmed rocky-road-a-holic.  This is usually his only request from Santa in his stocking and his go-to rocky road is Darrell Lea.  Well it was, until now.  I made this a few weeks ago and needless to say, it didn't last long.  I'm not normally a rocky road fan but there is something to be said about fresh rocky road.  

Because it's so easy and such a crowd pleaser I decided to make an extra batch last weekend and packaged them up for my colleagues today.  It was a hit, with one nameless person eating all of theirs before lunch!

I also had enough to give to my girls' teachers in a bar form, and will be adding the labels 'you rock' as you can see below - and I've saved you the time to create yours - you can download the A4 sheet of labels here.

Ingredients 
1 packet pascall marshmallows, cut in half
1 packet raspberries, cut in half
1.5 cups unsalted peanuts
500g nestle choc melts.

Method:
Add cut marshmallow and raspberries in a bowl, add unsalted peanuts, mix.


Melt chocolate in the microwave by putting the chocolate in a glass or heatproof bowl (make sure it's dry) and heat on 50% heat in 1 minute intervals stirring in between each minute. Should be melted at the 4 minute mark. Important that you mix in between or the chocolate will burn. 


Line a baking tray with baking paper, ensuring the paper raises up at the sides. Then pour the marshmallow/raspberry/peanut mix into the chocolate and mix quickly.

Pour into the baking tray. Press into the sides to ensure you have an even layer.

 Leave to cool on the bench for an hour before slicing and serving.

Cut into bars or bite-size pieces.

Place in an airtight container either in the fridge or a cool place.  Gift in boxes, preserving jars or paper bags.  You can buy the ones below on Ebay  Labels can be downloaded for free from here

Sunday, December 8

Chocolate Peanut Butter Pretzel Bites


You might have seen my facebook update this week that I had to re-make most of my Christmas treats because my Hubby got a little excited whilst I was away in Melbourne for a few days and gobbled the vast majority of what I had left, that were for Teacher presents.  Hmmm. 'They were so delicious!' he pleaded.  I suppose that I should take that as a compliment.. right?

So I thought I'd try to put something that he would really love - and I made a double batch 'just in case'. A good decoy I think.... Note, these are very rich - and you really only need one.  If you like Reeses pieces or peanut butter M&Ms then you might need a double batch also.  The recipe I've adapted this from, this is their regular batch but really you only need to make half, trust me on that one, double the below ingredients if you want lots.

These do need to be refrigerated so if you are making them for gifts do store them in the fridge before gifting and let your lucky recipient know.

Ingredients:
1 cup crunchy peanut butter
90g butter, softened
1 cup icing mixture, sifted
2 cups pretzels
3/4 cup choc chips
1 1/2 cups choc melts

Method:
In a mixing bowl put 2/3 cup of peanut butter with your 90g butter.  Mix until well combined.

Then add 1/2 cup icing mixture, mix well - then add rest of icing mixture.

Try not to eat this, pretty hard.

Mix in 1 cup of your pretzels and all your choc chips.  Do this with a spoon because you want t keep the pretzels kind of in pieces, not completely crushed.

 Line a tray and lightly spray it with canola oil (remember mine is doubled so use a square cake tin or small jelly roll tin...) and spread the mixture along the bottom evenly.

Then melt your chocolate - I do mine in the microwave - 50% power in one minute bursts, stirring in between - shouldn't take more than 2 minutes.  When done, stir through 1/3 cup peanut butter.

Now spread that over the peanut butter mixture and then press your remaining cup of pretzels on top.  Put in the fridge for at least an hour or two before slicing up.

Store in fridge after cut.

I've put some of our batch in the freezer cut up to have at a later date with vanilla icecream... yum!

Tuesday, December 11

Quickie Candy Cane Fudge


I love fudge but what I don't like is how much attention you have to pay to it.  It's like a toddler, take your eyes off it for a second and disaster can strike.  Since discovering this microwave method a few years ago I've not looked back.  This is sooo great for Christmas gifts, especially if you want to do something with the wow factor that doesn't take a lot of time.

And Peppermint and dark chocolate, you cannot go wrong, my favourite combination with chocolate!
Please try this, I promise you and your recipients will love it!

Ingredients
100 grams candy canes
125gr butter
1 cup packed brown sugar
2 tb liquid glucose
1 tin condensed milk
200gr dark chocolate
1/2 tsp peppermint extract

Method:
This is the time to crack out your Christmas frustrations, put your candy canes into plastic bag and whack it with a rolling pin.  Do it as chunky or as fine as you like.  I like a bit of both, I like to be able to tell you've used candy canes.  Some people like dust.


I've used the Woollies select ones this year because no artificial colours... they're kind of pink!
Grease and paper your tin, a quick tip from me, I freehand fit my tin (20x20cm) by placing it on top of the baking paper and cut a triangle/square at the corner.  When you lift it in it will slightly overlap but not bulk in the corners

I spray under and over the paper too.

Into a microwave-proof bowl, try to make it glass or ceramic, not plastic... add the condensed milk, butter and brown sugar together.

My tip for adding glucose syrup is lightly spray your spoon first.  It's such sticky stuff, that makes really easy to get into the jar, get it out and get it off the spoon.  Poor Laura went into a panic, 'Mum, DON'T PUT GLUE IN THE FUDGE!'  It does look like glue, but it's not, well not really - sugar glue I guess!

Stir it all together and put it in the microwave on 70% heat for 2 minutes, stir.  Back into the microwave for 2 minutes on 70% heat again for 2 minutes, stir again, lastly on 70% for 3 minutes, then take it out.

It's all lovely and caramelly.


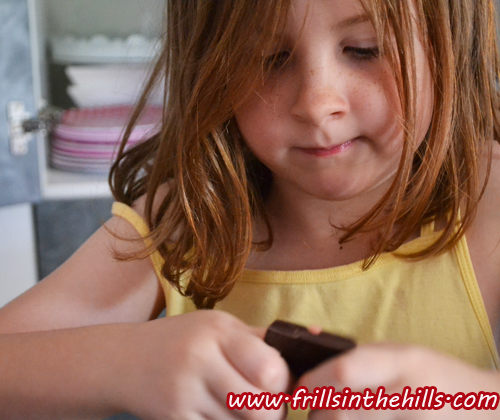
Get your helpers to break up the dark chocolate.  This takes skill and concentration.

And some muscle sometimes.. but it keeps them quiet!

Drop the chocolate into the mixture half at a time and stir it in until it melts.  Doesn't take long.


Drop in the extract and you're almost done, give it a good stir.

Pour into your tin, it will be fudgy already... smooth down the top.

Crumble your candy cane on top.  Place a layer of baking paper on top and put in the fridge for about 40 minutes.

Cut up some baking paper in about 10cm squares.  You'll need about 30 of them.

Start slicing off your fudge with a large sharp knife, place each individual piece on a piece of baking paper and into an airtight container.

Store in the fridge for about a week - best if eaten within minutes.. ok, not really but you'll want to.. those crunchy bits of candy cane and the smooth smooooth fudge.  Try to stop at one piece.. go on...

Thursday, March 31

Video Tutorial: How to make creme caramels!


Hello friends!  Well today you are invited into my kitchen in a whole new way.  By video.  You get to hear me say 'so, ok' about eleventy billion times.  If you are one of my overseas visitors (hello!) you get to hear my Aussie accent and all of you get to see how shocking I look without make-up..!  But, I'm not the star here, it's the food right?

And today's star is the creme caramel.  with only five real ingredients it's not so hard but I think something that people are worried they may not be able to pull off. Toffee in particular scares people I've been told.  So to show you how utterly achievable and fabulous these are I decided to do our first video tutorial!  I hope you love it!


I want to dedicate the video to a dear friend whose mother has recently passed away - she was a lover of all things French - my thoughts and love are with you. xxx

Ingredients:
Caramel
2/3 cup caster sugar
water to cover

Custard (Creme)
2 cups milk
1 cup cream
1/2 tsp vanilla bean paste (or 1 tsp vanilla extract)
2/3 cup caster sugar
4 eggs

Equipment:
6 small or 5 large ramekins, greased with canola spray
1 large baking dish
1 small saucepan, 1 medium saucepan
1 mixing bowl
1 whisk
1 ladle

Method:
  • Preheat oven to 150 degrees c
  • Spray some canola oil in 5 large-ish ramekins or 6 medium ramekins (you could make one large one if you like too!)
  • Add 2/3 cup caster sugar to a saucepan with just enough water to cover and put on to boil on the stove.  Do not stir, but shake the saucepan to keep it mixing until it starts to form a golden brown colour, remove from heat immediately and pour into your moulds.
  • Place your ramekins in a baking tray and fill the baking tray (not in the ramekins) with water until they reach about 2/3 of the way up your ramekins.
  • Next to another saucepan add cream, milk, vanilla extract/bean paste and remaining sugar.  Bring to a boil and ensure all sugar is dissolved.
  • Beat eggs in a large bowl until well combined and then slowly beat in the hot milk until all combined.   Ladle the custard into the ramekins and then place in the oven for 40-50 minutes until the custard becomes gelatinous - wobbly but firm.
  • Remove from oven and take the ramekins out to cool for about hour.  Serve warm or cover with cling film and serve when ready - you can make these a day ahead if you need to!


So my friends, be kind.... was the video helpful?  I need a personal stylist don't I?  What recipe do you feel you'd love a video on?

Tuesday, February 8

Party Palooza or school fete: The toffee/candy apple!


These are so cute!  I haven't made these for a good twenty five years so when a friend asked me if I could make her some for her gorgeous rosey-cheeked-baby-girl for her first birthday how could I say no?  Well I just couldn't and of course I didn't!

I have grand memories of eating toffee apples at school fetes and I figure we could all use a good recipe because with P&C/P&F and PTA's all ready to reconvene here at schools around the country (ours convenes tonight) there's bound to be a fundraising stall - be it cake stall or full blown carnival... so here's an idea for you!

Some extra tips:  don't make these if it's humid - toffee is temperamental in humidity.  Secondly as soon as you've covered your toffee apples, have a patty-pan or two on standby, fill those and then put your saucepan straight in hot soapy water to avoid sticky-toffee-saucepan :)


Ingredients:
12 small to medium red apples (I used gala)
3 cups white sugar
3 tb glucose syrup
1 cup water
1 tsp red food colouring


Method:
Mix your sugar, glucose syrup, water and food colouring in a saucepan - with a sugar thermometer (only about $5-6 at homeware stores) stir it to combine.

Whilst that simmers away - grease a baking tray and also put some chilled water (I used a mini-freezer block to keep it cold) on an assembly line somewhere you can put your hot saucepan (so if you can't put it on your surface find a trivet or wooden chopping board etc)

Put your sticks in your apples and set up in your assembly line.    Also fill your sink with hot soapy water.


When it starts to boil, don't stir anymore, just watch it boil - and when it gets to 295 degrees c - remove from the heat and put on your assembly line.

Then dip your apples - if you need to tilt your apple to make sure it gets covered well,  twist to distribute the toffee evenly.

Then dip it in your cold water saucepan/bowl - and then rest on your greased tray.

Wait until completely set before wrapping in cellophane and ribbon!


Frills in the Hills Copyright © 2009-2015