Showing posts with label glutenfree. Show all posts

Thursday, February 17

Easy Peasy - Gluten free almond pear flan


A few friends of mine have children with food intolerances/allergies.  I really feel for all of you out there dealing with this on a daily and even hourly basis.  Having the rethink the way you cook, the way you shop -what you eat as a family.  One friend recounted to me last year that whilst it was something she'd got used to on a day to day basis - going out was always a minefield.

Does the restaurant/cafe have gluten-free/dairy-free options?
Will the birthday party/playdate/canteen have options for my child?

She said she was constantly baking/preparing things 'just in case'.

This week Laura had a playdate at home with a girl from her class who was coeliac.  Not an issue for me but thought I'd whip up a quick flan with pears (which, are coming into season at present and are gorgeous!) and almond meal.  This can be ready in under and hour and honestly it's one of those dishes that you serve that no-one would realise you'd made it specifically for anyone with an intolerance.

It's light, fluffy, and full of flavour.


Ingredients:
150gr butter at room temperature
3/4 cup caster sugar
2 eggs at room temperature
1 tsp vanilla extract (or 1/2 tsp vanilla bean paste as I've used)
1 1/2 cups almond meal (150g)
1/2 cup gluten free self raising flour (or 1/2 cup plain gf flour with 1 tsp gf baking powder and 1/2 tsp bicarb)
3/4 cup soft pear, peeled and diced (used tinned if you like) plus another 1/2 pear or so for the top
slivered almonds for top (about 2 tb)


Method:
Preheat oven to 160 degrees c
Cream your butter and sugar.  Add vanilla and eggs one by one, whip well.

Add almond meal and flour again, beat well until light and fluffy.

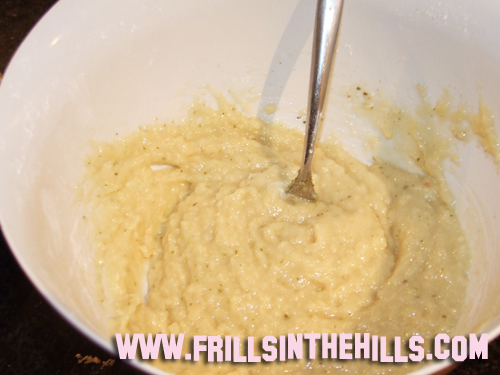
Add your soft pears and whip again until the pear has broken up evenly through the mix.

Grease a flan or pie tin well and pour your mix into the tin spreading evenly and top with some more sliced pear and sprinkle with slivered almonds

Bake for 40-45 minutes until golden brown on top.  It really doesn't need accompaniments, it's gorgeous on its own!
Do you cook for anyone with intolerances?

Sunday, January 9

Sunday baking project: Orange almond cake - YUM! (and it's gluten free)


Every man and his grandmother has made this cake I'm sure - well my grandmother has made it anyways - and my Mum.  And I'm pretty sure my sister has made it too.  Anyways I always like to eat it and I was inspired months ago whilst watching Food Safari on SBS when they had the Jewish cooking feature and a lady made it.

It is really low maintenance and let's face it a fabulous cake to have when you have coeliacs about - even us non-coeliacs will be vying for a piece.  It's gorgeous and moist and the preparation method of the oranges gives it a deep and sweet but not sickly taste.

I'm yet to find someone who doesn't love this cake.... I'm sure there's someone out there but they're crazy friends, crazy!! It's delicious!


Ingredients:
2 oranges (I used navel)
6 eggs
250g caster sugar
250g almond meal
1 tsp baking powder


Method:
In a large pot, boil your oranges for 2 hours. (Yes, I really wrote 2 hours!)  This can be done ahead of time and yes, you don't peel it or anything.    Once done, set aside to cool.

Preheat oven to 180 degrees c.

In a food processor mix your eggs and caster sugar until well combined

Chop up your oranges roughly, skin intact - the house smells glorious when you're boiling them and then they are bright and lovely when you cut them!

Plonk them into your egg/sugar mixture and process until orange is miniscule!

Then add your almond meal and baking powder, process until well combined.

Pour into a greased 18 or 20cm springform pan.

Bake for 1 hour - give or take 10 minutes depending on pan you've used.  Dust with icing sugar.. 

It's yummy served warm with cream too! (reheat in foil if you wish)

Are you baking today?

Join me at lunchtime for our next giveaway this week - if you're a baker - you'll love today's giveaway! x

Wednesday, October 13

Middle eastern feast #2 - Easy peasy lebanese-y hoummus


Out of all the dips available to my kids - this is only one of two they will touch, and this one is Eloise's favourite.  I think this might be because I used to make a chickpea cauliflower curry for her when she was on first foods and she adored that too.  Good taste my girl.

Anyhoo...  I serve this in lunchboxes with carrot and celery sticks.  Sometimes I'll sprinkle sultanas on top (I know that sounds wrong but Eloise likes it!)

For us adults I serve it with homemade Turkish bread or corn chips, usually with a salsa too.  Or I'll put it in pocket bread with lamb and some tabbouleh.  Sometimes I just eat it off the spoon, but don't tell anyone, ok?

How do you eat your hoummus?


Ingredients:
400g tin chickpeas, drained
2 tb tahini (sesame seed paste, you can get it from the healthfood section or shop)
2 cloves garlic
2 tb lemon juice
2 tb olive oil


Method:
Chuck everything in the food processor (love my new Braun Multiquick 7 cordless seriously!)  and process until creamy - add a little water if it's too thick.


If serving to adults you can garnish with a bit of olive oil and paprika!

Cost:  about $1.50!  Easy peasy lebanese-y.

Do you buy or make your hoummus?  A bit of both perhaps?

Friday, September 3

Nelbe shares her Gluten-free Godess-ness - Guest post - Gluten-free Brownies


I know I've told you before I have a friend locally who has been diagnosed with coeliac disease this year.  She has had to educate herself about all the new food she can eat, experiments regularly with gluten free alternatives but I know some days she does find it a difficult transition - given the rest of her family is not coeliac.  

I got some understanding of this when last month I was placed on an salicalyte and amine free diet by my immunologist which I found very de-motivating cooking wise.  It's just too tiring to think of an alternative all the time and in the end I just ended up eating the same things over and over... it was truly torturous!


So I have passed on Janelle's (Nelbe) site Nelbe's Gluten-free Kitchen to my friend and she's been inspired.  Janelle also shares links to resources and new gluten free products on the market that are easily accessible to anyone.   What a fabulous resource!


Janelle shares today a recipe she makes regularly - with a secret ingredient that makes it dairy free too!  I have road-tested it  - yet I doubled the recipe and forgot the baking powder.  You can see my my photos - it still works!


Thanks Janelle and ENJOY everyone!  Have a wonderful weekend - see you for Party Palooza tomorrow and Sunday baking project on Sunday xx.


Janelle writes:
I love yummy baked treats and as a coeliac all I make are gluten free. I love chocolate brownies and found this recipe on taste.com.au years ago. I tweaked it a little to make it perfect for me and my family.

One ingredient may surprise you – pumpkin! Yep, mashed pumpkin makes a yummy dairy free change to the mixture. Perfect if you ever run out of butter or you have friends who are dairy free.

The bonus to this is that my 5 year old son helps me cook in the kitchen. We have made this one that often that now he does not blink an eye to pumpkin going in. He knows that the pumpkin makes it yummy!


Ingredients:
1/2 cup rice flour
1/2 cup plain gluten-free flour (I use either Orgran or Aldi brand)
1/4 teaspoon baking powder
1/3 cup cocoa powder
1 cup caster sugar
2 eggs, lightly beaten
150g mashed pumpkin, cooled (ensure pumpkin is well mashed)


Method:
Preheat oven to 180°C. Grease a 4cm-deep, 20cm x 30cm (base) tin. Line with baking paper, allowing a 2cm overhang at both long ends.

Sift flours, baking powder and cocoa into a large bowl. Add sugar.

Stir to combine. Make a well in the centre. Add eggs and mashed pumpkin to flour mixture. Using a metal spoon, mix until just smooth.


Spread mixture into prepared pan. Bake for 30 to 35 minutes or until a skewer inserted in the centre comes out with crumbs clinging.

Remove from oven. Allow to cool in pan. Lift from pan. Cut into squares and enjoy!


Tuesday, August 31

Lunchbox Legends: Easy peasy gluten free slice


I'm sure there's some of you out there who are either coeliac or have kids who are.. so I thought I'd try a gluten-free lunchbox legend this week!

Even if you're not coeliac, it's yummy.  I thought my manly husband would turn his nose up at it.  Umm no.  I've had to hide it as he's had 3 pieces in one day!  Don't be put off if you don't have gluten free self raising flour, just substitute the GF self raising flour in this recipe for 1 cup regular self raising.

It really doesn't get any easier than this!  There's no butter in this either - so not-so-much fat.


Ingredients
1 3/4 cups gluten free self raising flour (I used the Aldi brand)
1 cup desiccated coconut
1/2 cup raw sugar
1/2 cup honey
1 cup raisins (or sultanas or even freeze dried strawberries if you like - get creative!)
1 cup milk


Method:
Preheat oven to 180 degrees c.

In a bowl, mix all ingredients together either with stand mixer or by hand.  Ensure the mixture is thick but not stiff, add flour or milk as necessary to ensure the right consistency. (GF flour can differ depending on the brand)

Pour mixture into greased slice tray.  Bake for 35-45 minutes until golden brown on top.  Check if cooked through using skewer method.

Allow to cool for about 20 minutes, then slice into desired sizes.  Great with a cuppa too!

Wednesday, July 28

Gluten-free Jam tarts


Oh man.  This one was a journey.  I know there's a good few of you who either are gluten intolerant or regularly cook for people who are.  When I went to the Good Food and Wine Show a few weeks ago, I recognised the Spring Gully stand from the Worcestershire sauce.  I was given a sample some time ago and was converted because their gluten free version is not so salty, just tasty.

The lovely girls at the stand were kind enough to give me two jars of gluten free jam.  I know, who knew there was gluten in jam right?  I make mine but if you buy jam you might not realise that it's not only pectin that makes your jam/conserve thick....

Anyways, to make the most of this lovely boysenberry and honey jam I thought I'd give gluten free pastry a go.  Der-dowww............  fail first go.  I used gluten free bread flour.  It smelt like seaweed which you can imagine was not entirely appetising.

This one though is a go-er.  It's just the right amount of crumbly - yummy.


Ingredients:
250g (1/2 box) of Organ Gluten free plain flour
80g icing sugar
110g butter, cold, diced
2 egg yolks
water, as needed
3/4 jar Spring Gully gluten free jam


Method:
In a food processor add the flour and icing sugar.  Add butter and process until resembles breadcrumbs (about 40sec-1 min)

Add egg yolks and continue to process and add water a tsp at a time until the mix comes together in one big ball.

Remove, place in a ziplock bag and into the refrigerator for an hour.

Preheat oven to 180 degrees c.

Sprinkle gluten free flour onto a surface and roll out your dough.  I found this pastry can stick very easily and goes soft very quickly, so work quickly and make sure you use a good sprinkling of flour underneath before you roll it out.  Cut out and placed onto your creased tart tray.

Fill with a heaped teaspoon of jam and then add a shape of your choice! (love my able assistants?)


Bake in oven for 10-12 minutes.  Allow to cool in the tray, or they will crumble! (As I found out, look at the 'g' ;)

Wednesday, July 21

Gluten-free Lemon Myrtle Friands


Now I know most you will be thinking 'oh yeah... lemon myrtle spice... got a big bucket of THAT... not.' but read on.  I'm not expecting you to go out and buy some - but it's delicious if you have some OR you could just substitute with some lemon zest.

How I came to have a truckload of lemon myrtle spice?

We picked up some on our trip to my Aunt's place last year.  She lives on a property with a macadamia orchard and lemon myrtle grove.   We went to Lennox Head markets and picked up some spice and upon returning home realised our error.  The spice jar was just ground up dried lemon myrtle leaves.  Leaves we could see as far as the eye could gaze.  D'oh!   

My aunt on our departure offered us some more leaves to make our own spice, just walked over to a branch with about 200 leaves and pulled it off and put it in the back of the car.   It's all we could smell all the way home.  Delicious.


Ingredients:
180g butter, melted
200g icing sugar, sifted (CSR's is gluten free)
60g gluten free flour,sifted
120g almond meal
5 egg whites
1 teaspoon lemon myrtle spice*

*substitute this with zest of one lemon if you don't have :)


Method:
Preheat oven to 200°C.

Grease a friand tray with some of the melted butter (use a cupcake tray if you do not have one).

Place icing sugar and flour in a mixing bowl, add almond meal and stir through with a fork.

In a separate small bowl, beat egg whites with a fork, then add the dry ingredients in the other bowl to the mix. Combine using a fork and then add the lemon myrtle spice (or lemon zest). Mix well.


Spoon the mixture into the tin until each mould is 3/4 full.

Place in the oven on the middle shelf and bake for 10 minutes. Rotate the tray 180 degrees (so the part of the tin that faced the front of the oven now faces the back) and bake for a futher 5-10 minutes until golden on top.

Cool, and dust with icing sugar to serve.

I also love these with lime and raspberries.  Use lime zest and drop two frozen raspeberries in each mould before placing in oven.

Sunday, May 2

Sunday Baking Project:Gluten Free Chocolate Chestnut Cake


Each Thursday I take the little frills along to playgroup.  I try and pretend it's all for them, but I confess it's as much for me as them.  The playgroup Mums (and Dads!) have built such a great rapport, and we've become friends outside of our Thursday morning get-togethers.  Our kids are starting school together, and ever-so-often we welcome a new baby too.

There's a (not so) secret movement to engage me to bake for the group every week - as I invariably am baking anyways - and I can't do open and close as my contribution of the roster... this week one of our lovely ladies has been advised no more gluten - she's handling it well she thinks, but laments she may have to miss out of my baking which made her sad.  So I set to work in looking through my cookbooks - and I found this gem - from the 'How to be a Domestic Goddess' by Nigella Lawson.  Kath, never fear, you won't need to miss out.

I have altered it a little, just because I'm not a fan of rum, and I had fresh chestnuts, but you all come to expect that from me right?

It seems like a bit of effort, and there's a bit of washing up to do but it's such a pleasure to make.  I love nothing more than stirring chocolate into a cake, do you?  Makes me feel so homey and domestic-goddess-like.

Ingredients:
425g chestnut puree (I made mine from scratch using this recipe or you can buy it from the supermarket)
250g 70% cocoa chocolate (I used the new Lindt 70% cooking chocolate - comes in a 200g block)
125g butter
6 eggs, separated
1 tsp vanilla extract
1 tsp rum (I omitted)
60g caster sugar
25g brown sugar

Method:
Preheat oven to 180 degrees c

In a food processor, combine your chestnut puree, butter, egg yolks and vanilla extra.

Melt your chocolate by breaking into squares and putting into microwave safe bowl and microwaving at 50% power for 1 minute, take out, stir and return to the microwave at 50% off for a further minute.

Add chocolate to the chestnut mix, mix well, remove into large bowl.

In another bowl, whisk your egg whites until doubled in volume and fluffy.  Add caster sugar and continue to whisk until they become shiny and stiff.  

Sprinkle brown sugar on top and stir through gently.

Add meringue mixture to the chestnut mixture 1/3 at a time and combine gently.  It will form a mousse like quality.  At this point you'll want to fold and fold, it looks wonderful (go on, dip your finger in and taste it, you know you want to!)


Pour into a greased springform tin and bake in the oven for 40 minutes.

Psst if you cook with Lindt - look out for the specialty cooking chocolate in Coles and Woolworths!

Monday, March 29

Raspberry Rice Rectangles - no baking!


Hello!


You're going to love these ones if you have kids, or even if you don't!  These are a great addition to a lunchbox or to take to a BBQ or have a birthday party.  I know these will have an encore performance at Pink Ribbon Day for sure!


They take about 15 minutes to prepare so really, no baking required!


Ingredients:
280g raspberry and vanilla marshmallows
75g butter or margarine
4 1/2 cups rice bubbles
1 cup rolled oats
1/2 cup dessicated or shredded coconut
1 cup dried raspberries (you can get these from fruit markets/deli or healthfood shops)


Method:
In a saucepan, melt the butter and marshmallows together over medium heat.  Stir and take off the heat once melted.


In a large mixing bowl combine the rest of the ingredients


Prepare a baking dish with aluminium foil, ensuring all sides are covered with some overhang to fold over the top.


Stir in the marshmallow and butter mix and stir quickly to combine.


Press the mixture into the baking dish, make sure it's compacted by pushing down into the corners with wet hands.


Cover the top and transfer to the refrigerator for 2 hours.


Take out of fridge and lift out the aluminium foil, peel off and cut into rectangles (or any shape you like!)


Store in airtight container away from direct light for 3-4 days


Frills in the Hills Copyright © 2009-2015