Friday, February 1

Muffin Mania: Citrus Cranberry Muffins


I'm mad for citrus at the moment, and I can't tell you why.  It seems odd because citrus really isn't in season, it might be because I've just returned from 2 1/2 weeks in snow and sub-zero temperatures and my body is a bit confused.  Anyways, at least citrus isn't hideously expensive at the moment and you don't need a lot of it to make this delicious stash.

Although I did make these because of my cravings, it was in part to build up my stash again for lunches.. but I will confess a few may go missing...


Makes 24
Ingredients:
1 large orange
1 medium lemon
2 small limes
1/4 cup canola oil
3/4 cup golden caster sugar (or regular if you don't have it handy)
1/2 tsp cinnamon
1 egg
2/3 cup milk
2 1/2 cups self raising flour
2/3 cup dried cranberries/craisins


Method:
Preheat oven to 190 degrees c
Half all the fruit, and drain the juice into a mixing bowl.  Do not throw away the peel, set aside.

In a blender, add the peels, and blend until smooth.

Add the peel back to the juice.  Add the sugar, stir well.
 

Add oil, cinnamon and egg, stir again.

Lastly add milk, flour then cranberries, stir well.

Pour into muffin/cupcake papers and bake for 15-20 minutes.

These smell so good at this point you'll be licking the bowl..

 And you'll be hungry while they bake, sorry thought I should warn you!

Freeze in ziplock bags for up to 3 months

Muffin Mania: Cheese and Salami muffins


Sometimes you just don't want to put sweet things in the lunchbox.  Some times, you don't want to put sandwiches in the lunchbox.  Sometimes you have grazers who would never eat a full sandwich anyway.  This recipe is a great solution for all the that - and hey, they're not just great for lunchboxes but for afternoon tea after school or not even for school kids!

If you have a cheese-or-savoury-lover rather than sweet give them a go - the salami doesn't need to be spicy.  Use bacon or proscuitto or something else if you don't like salami.

These freeze really well, if you want to serve warm, just heat them in the oven from frozen for about 15 minutes.. can't go wrong!

Makes 12-15 depending on size
Ingredients:
75g melted butter
3/4 cup buttermilk
1 1/4 cups self raising flour
1 egg
100grams grated cheese
100grams sliced salami
pepper


Method:
Preheat oven to 180 degrees c

Grate your cheese and to 80% of the sliced salami, dice.


Into a mixing bowl, mix melted butter, and then gradually add the buttermilk and mix together.

Add the egg, flour and pepper, stir well until all combined.

Stir through the about 80% of cheese and all of the diced salami.

Add some herbs of your choosing.  I added some thyme, but parsley or rosemary would be nice too.

Spoon the mixture into cupcake cases, sprinkle your reserved cheese and sliced salami on top.

Bake for 20 minutes.  Try not to eat them all before you get them in the freezer!


Wednesday, January 23

My 5 top tips to get your kids to eat everything in their lunchbox (and for you to avoid lunchbox anxiety!)


Coming to that time of the year here in Australia when attentions turn to getting back to school.  Hairdressers are booking out, getting school shoes is like entering a war-zone of over-frustrated parents and their kids and countdown timers start to appear on desktops (XX days until school starts).  

My Hubby has done most of the school holidays solo this year, he's very ready for the frills to return, but me, I love having them at home - and like to have the break from the rush of getting to school, the million lists of things that have to be in the bag on certain days.. 

I've just started up my lunchbox baking for stashing, (check out my lunchbox legends category with over 60 posts for ideas) and went to a GLAD Sandwich masterclass this week for some ideas.  I don't have trouble getting my frills to eat their lunches but it does seem to be a common problem for a lot of people - I'm guessing my kids are either not picky or prioritise food over playtime.. but I do have a little bit of a system I think does help.

1.  Keep it varied
Even though your kid's favourite sandwich might be vegemite on white bread, it's good to mix it up.  It doesn't need to be a sandwich for one.   It could be sushi, or summer rolls, mini quiches, macaroni slice or even some savoury rice, boiled eggs - try this once a week... variety keeps the whole lunchbox opening a surprise and a little bit of anticipation 'what have I got today?!' happening.

2.  Keep it simple
You don't need to spend 2 hours assembling lunchboxes.  Kids don't need 24 different varieties of things just in case they don't feel like something.  I keep it to 4 things in the lunchbox.  

1 main thing (like the sandwich, sushi, quiche etc.) to have at lunch
3 small things (to give them a choice of when to have it - 2 for recess, one for lunch is what I encourage my girls to do)

Some examples of small things:
  1. - dried mixed fruit bags - like sultanas, raisins, dried apples, apricot balls, banana chips
  2. - yoghurt (I usually give plain yoghurt and dress it up with a dash of vanilla or stir through a blob of jam)
  3. - boiled egg
  4. - baked goodies (muffins, slices, muesli bars)
  5. - Piece of fruit or some loose small fruits like grapes, blueberries, cut up strawberries, some cherry tomatoes
  6. - crackers & diced cheese
  7. - Popcorn (this way it's ready in 3 minutes - don't by the microwave popcorn!)
  8. - some veges to dip, I find my kids will eat more carrot sticks if I give them something to dip it into (tzatziki is Olivia's favourite and hoummus is Laura and Eloise's!)
3. Stash, stash stash - get organised!
Bake and stash muffins, slices, muesli bars.   I am having a big bake up this week and will make 5 varieties and put them in my deep freeze in week lots.  3 of each thing in a zip lock bag = 15 things.   I take this out of the freezer on a Sunday night and we pop it in the lunchbox from the bag each day.  Easy.


You can also make up the mini-zip lock bags with dried fruit as above in lots - don't buy boxes of sultanas/dried fruit, as I learned - a big waster of money when you can make loads of bags with variety.  I do the mini-bags with rice crackers, water crackers, popcorn or just plain cheerios.  I put them all in a big storage container already made up in my pantry... then you can just pull them out when needed, great for emergency car snacks too.

For the fridge you can cut up cubes of cheese, put carrot/celery sticks in them and keep them in the crisper ready to go. 

4.  Get a decent lunchbox and drink bottle
Make sure they will last AND that your kids can actually open them.  If your child is prone to losing things, don't buy expensive ones.  I like compartmentalised lunchboxes - these ones are a bit on the larger side but they fit everything and we've been using them for 2 years and I've only had to replace one.  I have had to buy some more of the inner compartment - due to being lost but love them, they're liquid type.


For the drink bottle, do not recommend a spout that can be chewed.  You're asking for leaking drink bottles on homework, artwork, lunch and your car.  Learn from my heartaches.. please!

Something with a screwtop lid is your best bet - easy to wash too
5.  Get your kids involved!
And by this, I don't mean ask them what they want.  At 5 they can learn to butter bread, by 7 they should be able to make a sandwich, even little ones at preschool can help get all the stashed stuff together and put it in their lunchbox.  Get your kids to help in the baking, choosing the crackers.  They are much more likely to eat something they associate fun or something of their choosing with.


Anything you'd like to add?  What's your experience with lunchboxes? Do they come home full or empty?

Friday, December 28

Free printable - my bathroom sign (with a bit of backwards humour!)


When you don't move into a new house there are relics from those who've been there before you.  In this house, it's picture hooks, we must have removed, plastered and painted over at least two dozen of them in our lounge and dining room, about 6 in our dining room and we still have a ways to go.

there are some picture hooks though which I've re-used, and this one is one of the very few.  Every time you wash your hands after using the family bathroom, there's a big hook looking at you in the reflection.. so I put a quick end to that on all days, Christmas Eve.  Couldn't look at it a second longer.

Something I'm always on to my frills about is washing their hands properly, with soap.  So I thought whilst they are in there washing their hands it couldn't hurt for a reminder.  But they'd be looking in the mirror so I reversed it... :)


I just printed it in A4 and put it in an Ikea frame.

Of course, when you look at it in the mirror it looks like this:

and up close:

DOWNLOAD HERE! FREE!  

Here's the reversed signs:
Blue (like in the first image)
Lifesaver (like the one I have framed)

Here's the non-reversed signs (in case your view of not of the mirror!)
Blue
Lifesaver

Tuesday, December 18

2012 - Reflection on the year, this blog and my food highlights


At the end of each year I, like most people find myself reflecting on the year and think about what happened, great times, challenges and what I want 2013 to be.

This blog has been so much a documentation of my kids growing up, which is what I originally intended it to be - nearly four years ago in fact!  It started because I had a very scary brush with death and went through a bit of an existential crisis - how would I want to be remembered by my kids if I had passed away?  Would they know me?  

This grew from my thoughts to sharing our time together in photos, sharing my recipes.  Little did I know sharing the recipes I created and tried would help me form a community which has given me so much - when readers say 'thanks for sharing' I always am thinking 'thank YOU for sharing' because having an outlet, having Mums like me (and not just Mums - Dads, grandparents and just food lovers in general!) connect on some common ground has brought me so much happiness.

This blog is much, much more than a blog. Whilst I'm away it's a portable memory bank.  I can document some of my experiences.  When I'm homesick, I read through my old posts and get a big hug from the photos.   Conversely Hubby is able to re-create the kids' favourites through having Mummy's cookbook at his fingertips.   Although I can't be with the kids all the time I know they are still eating Mumma's food!  

Quick highlights of 2012:

We rang in the new year in Manila, Philippines.  It was the Frills' first trip overseas and mine and hubby's first overseas trip together ever.  We went to Tagaytay, the kids and hubby went to Intramurros and Ocean Park whilst I was at work and we did a whoooole lot of shopping.   


Food highlight:  Crispy Pata at Josephines, Tagaytay.

As a family we went to Hong Kong for a weekend, that was amazing.  It's a big deal taking your kids to Disneyland, especially if you've never been.  And even if it's only Hong Kong Disneyland it's still magical.  I know that's something that as a family we'll be talking about well into the future. (Especially about my Space Mountain 'episode' haa!)

Food highlight:  Mickey Waffles

In April, my Mum came and met me in Manila whilst I was on a business trip and I took her to Boracay for the weekend.  It was fabulous but the only downside was it wasn't long enough.   I would totally recommend trip to Boracay - but as a couple or a group - not a family. It's perfect for those who need a total chill-out,  a massage and some blue skies.


Food highlight:  Roasted Crab at Cyma Restaurant
Cyma Roasted Crabs

In June our beautiful Eloise turned eight  - there's something about your eldest's  birthday - it makes you realise life it too short and how quickly kids grow up.  She had a fabulous birthday and we took her and her friends bowling.


And as if life wasn't hectic or exciting enough, in July we moved house!  Just around the corner from our old house. I literally got off a plane, went to Ikea, painted the new house, moved in and went on another plane.  Crazy? Yes.


We are finally settled in and looking forward to our first Christmas here.

And in July I celebrated my birthday... on an airplane.  I'm not joking I was travelling between Manila and Kuala Lumpur - I spent a lot of my year in planes.  Believe it or not I still live in Australia most of the time - but I do travel every month internationally for around 2 weeks.  Sometimes longer, sometimes shorter.   In October I was away the entire month, but there have been a few (and I mean two) months this year I haven't travelled at all.

We did do some more travelling together as a family though, in September in Cairns my baby sister got married and my Frills with their cousins, were flowergirls.  A very special time for our family.


I have been to some cities for the first time this year - Shanghai and Dalian in China and Jakarta Indonesia.  Definite highlight was a jam-packed Saturday I spent in Shanghai.  

Food Highlight:  Soup Dumpling (Xiaolongbau) in Shanghai

Now we are upon my little twin's 7th birthday.  Time is flying!

So those of you who have followed since the beginning, the middle or more recently, thank you for continuing to visit, and sharing your thoughts, comments, recipes, experiences.  This blog is not shutting down or being deleted, abandoned, it's just changing like my life and my family.

In 2013 there's going to be a face-lift.. there will still be recipes, there will be more family travel and more of my girls growing up.. that bit is inevitable!

Wednesday, December 12

Buffalo wings, made at home!


I have an embarrassing confession to make.  I never understood why buffalo wings were called buffalo wings... I mean, they are made with chicken.. it wasn't until a few years ago I twigged they hail from the city of Buffalo NY in the US.  I know.  I feel pretty dumb!

I never really had them until I went to the Philippines either.  The Philippines I refer to as the 53rd state of the US.. It still has a very strong American influence - in it's restaurants, shops and the accent.  There's still a strong American Military presence there also.  

So anyway, back to the buffalo wings... I was surprised at how tasty they were, how moreish and most of all how they were spicy without being too much.  I knew I had to make them for my hubby, a must-make on my list for a while.

The difficult thing about making buffalo wings here in Australia is the sauce most Americans use for it is bought at the store, but not readily available.  So I made my own.  You'll need 1 batch of sauce for 2kg of chicken drummettes.  So clearly you can make a lot, or you can use some of the sauce and make smaller batches.

I used drummettes.  I asked for them at my butcher, sometimes you can get lucky and buy them, but if you don't, just buy chicken wings and cut them at the joint.  Or if you can't be bothered, just leave them whole.

Makes 2kg  - serves 10-15 people for nibbles
Ingredients
2 kg chicken drummettes or wings
1 batch chilli sauce
50 g butter
3 tb worchestershire sauce

Method:
Preheat oven to 180 degrees c

In a saucepan heat the sauce, butter and Worcestershire sauce until the butter is completely melted.  Set aside.


In a frypan, add about 3cm of canola oil and heat until it's ready for shallow fry (it's spits a little)
Add your chicken in batches, then transfer to a tray with kitchen paper to drain.


When all finished, pour the sauce over the wings, and heat in the oven for about 15-20 minutes.

Serve with blue cheese dip if you like!  

I made mine with 100g blue cheese crumbled into 2/3 cup mayonaise and 2/3 cup sour cream and a squeeze of lemon juice.


Just remember one thing.. don't double dip.. well...unless no-one is watching!


Tuesday, December 11

Quickie Candy Cane Fudge


I love fudge but what I don't like is how much attention you have to pay to it.  It's like a toddler, take your eyes off it for a second and disaster can strike.  Since discovering this microwave method a few years ago I've not looked back.  This is sooo great for Christmas gifts, especially if you want to do something with the wow factor that doesn't take a lot of time.

And Peppermint and dark chocolate, you cannot go wrong, my favourite combination with chocolate!
Please try this, I promise you and your recipients will love it!

Ingredients
100 grams candy canes
125gr butter
1 cup packed brown sugar
2 tb liquid glucose
1 tin condensed milk
200gr dark chocolate
1/2 tsp peppermint extract

Method:
This is the time to crack out your Christmas frustrations, put your candy canes into plastic bag and whack it with a rolling pin.  Do it as chunky or as fine as you like.  I like a bit of both, I like to be able to tell you've used candy canes.  Some people like dust.


I've used the Woollies select ones this year because no artificial colours... they're kind of pink!
Grease and paper your tin, a quick tip from me, I freehand fit my tin (20x20cm) by placing it on top of the baking paper and cut a triangle/square at the corner.  When you lift it in it will slightly overlap but not bulk in the corners

I spray under and over the paper too.

Into a microwave-proof bowl, try to make it glass or ceramic, not plastic... add the condensed milk, butter and brown sugar together.

My tip for adding glucose syrup is lightly spray your spoon first.  It's such sticky stuff, that makes really easy to get into the jar, get it out and get it off the spoon.  Poor Laura went into a panic, 'Mum, DON'T PUT GLUE IN THE FUDGE!'  It does look like glue, but it's not, well not really - sugar glue I guess!

Stir it all together and put it in the microwave on 70% heat for 2 minutes, stir.  Back into the microwave for 2 minutes on 70% heat again for 2 minutes, stir again, lastly on 70% for 3 minutes, then take it out.

It's all lovely and caramelly.


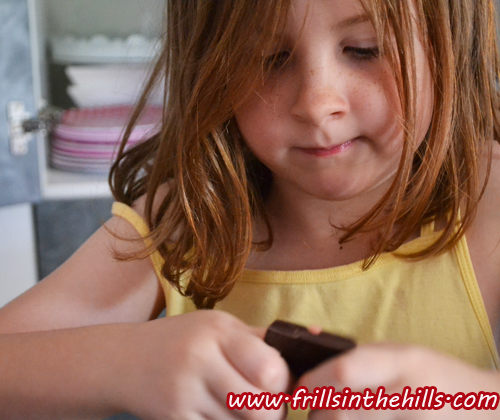
Get your helpers to break up the dark chocolate.  This takes skill and concentration.

And some muscle sometimes.. but it keeps them quiet!

Drop the chocolate into the mixture half at a time and stir it in until it melts.  Doesn't take long.


Drop in the extract and you're almost done, give it a good stir.

Pour into your tin, it will be fudgy already... smooth down the top.

Crumble your candy cane on top.  Place a layer of baking paper on top and put in the fridge for about 40 minutes.

Cut up some baking paper in about 10cm squares.  You'll need about 30 of them.

Start slicing off your fudge with a large sharp knife, place each individual piece on a piece of baking paper and into an airtight container.

Store in the fridge for about a week - best if eaten within minutes.. ok, not really but you'll want to.. those crunchy bits of candy cane and the smooth smooooth fudge.  Try to stop at one piece.. go on...


Frills in the Hills Copyright © 2009-2015